
Single-use protective bags wrap the handpiece from tip to grip, helping reduce cross-contamination and keep every session feeling clean and controlled.

Slip on a fresh barrier before each treatment to help isolate the handpiece from skin, fluids and residue.

The sleeve shields the device body while leaving only the needle tip exposed, keeping handling hygienic during use.

After the session, peel off and discard the used bag to leave the handpiece dry, tidy and ready for the next setup.

MAP CONCERNS
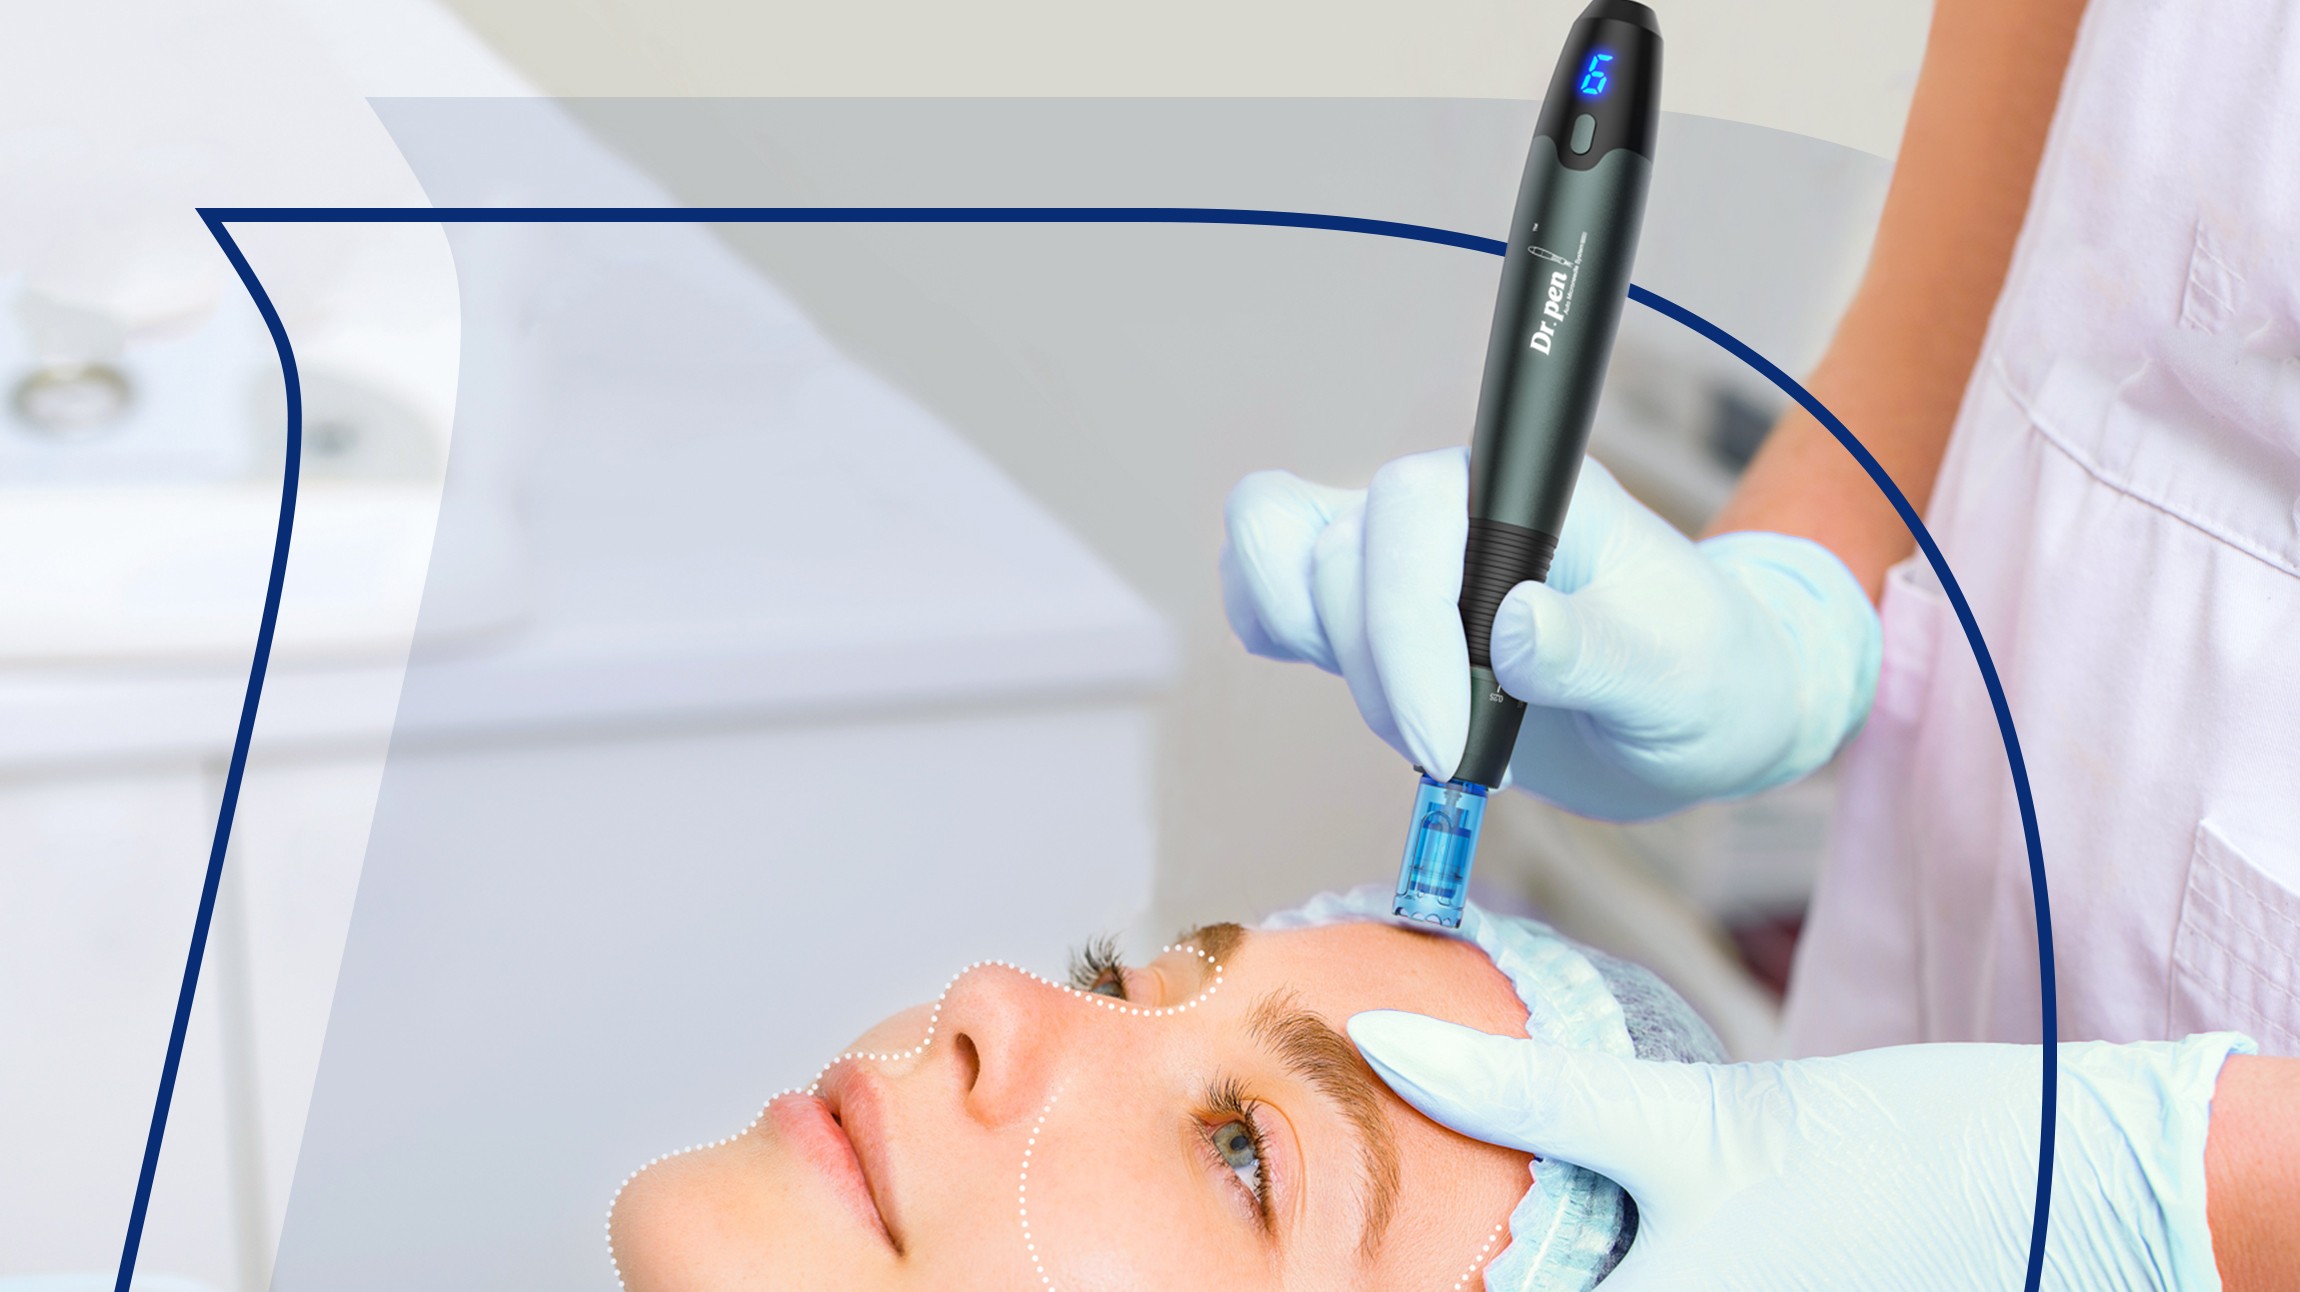
Focus on where issues show most: acne marks, pigment spots, scars or fine lines.mark out key zones such as cheeks, forehead and jawline to track change over time.
PLAN ZONES & DEPTH
Divide the face into small areas and choose a conservative depth for sensitive skin.for thicker skin or old scars, increase needle length gradually over several sessions.
TREAT EVENLY
Glide in straight, slightly overlapping passes along each zone, following the lifting arrows. Keep moving so no single spot is overworked and coverage stays even.
SUPPORT RECOVERY
After each session, calm and hydrate the skin, avoid strong actives and protect from sun.well-spaced treatments help refine pores, soften marks and smooth overall texture.

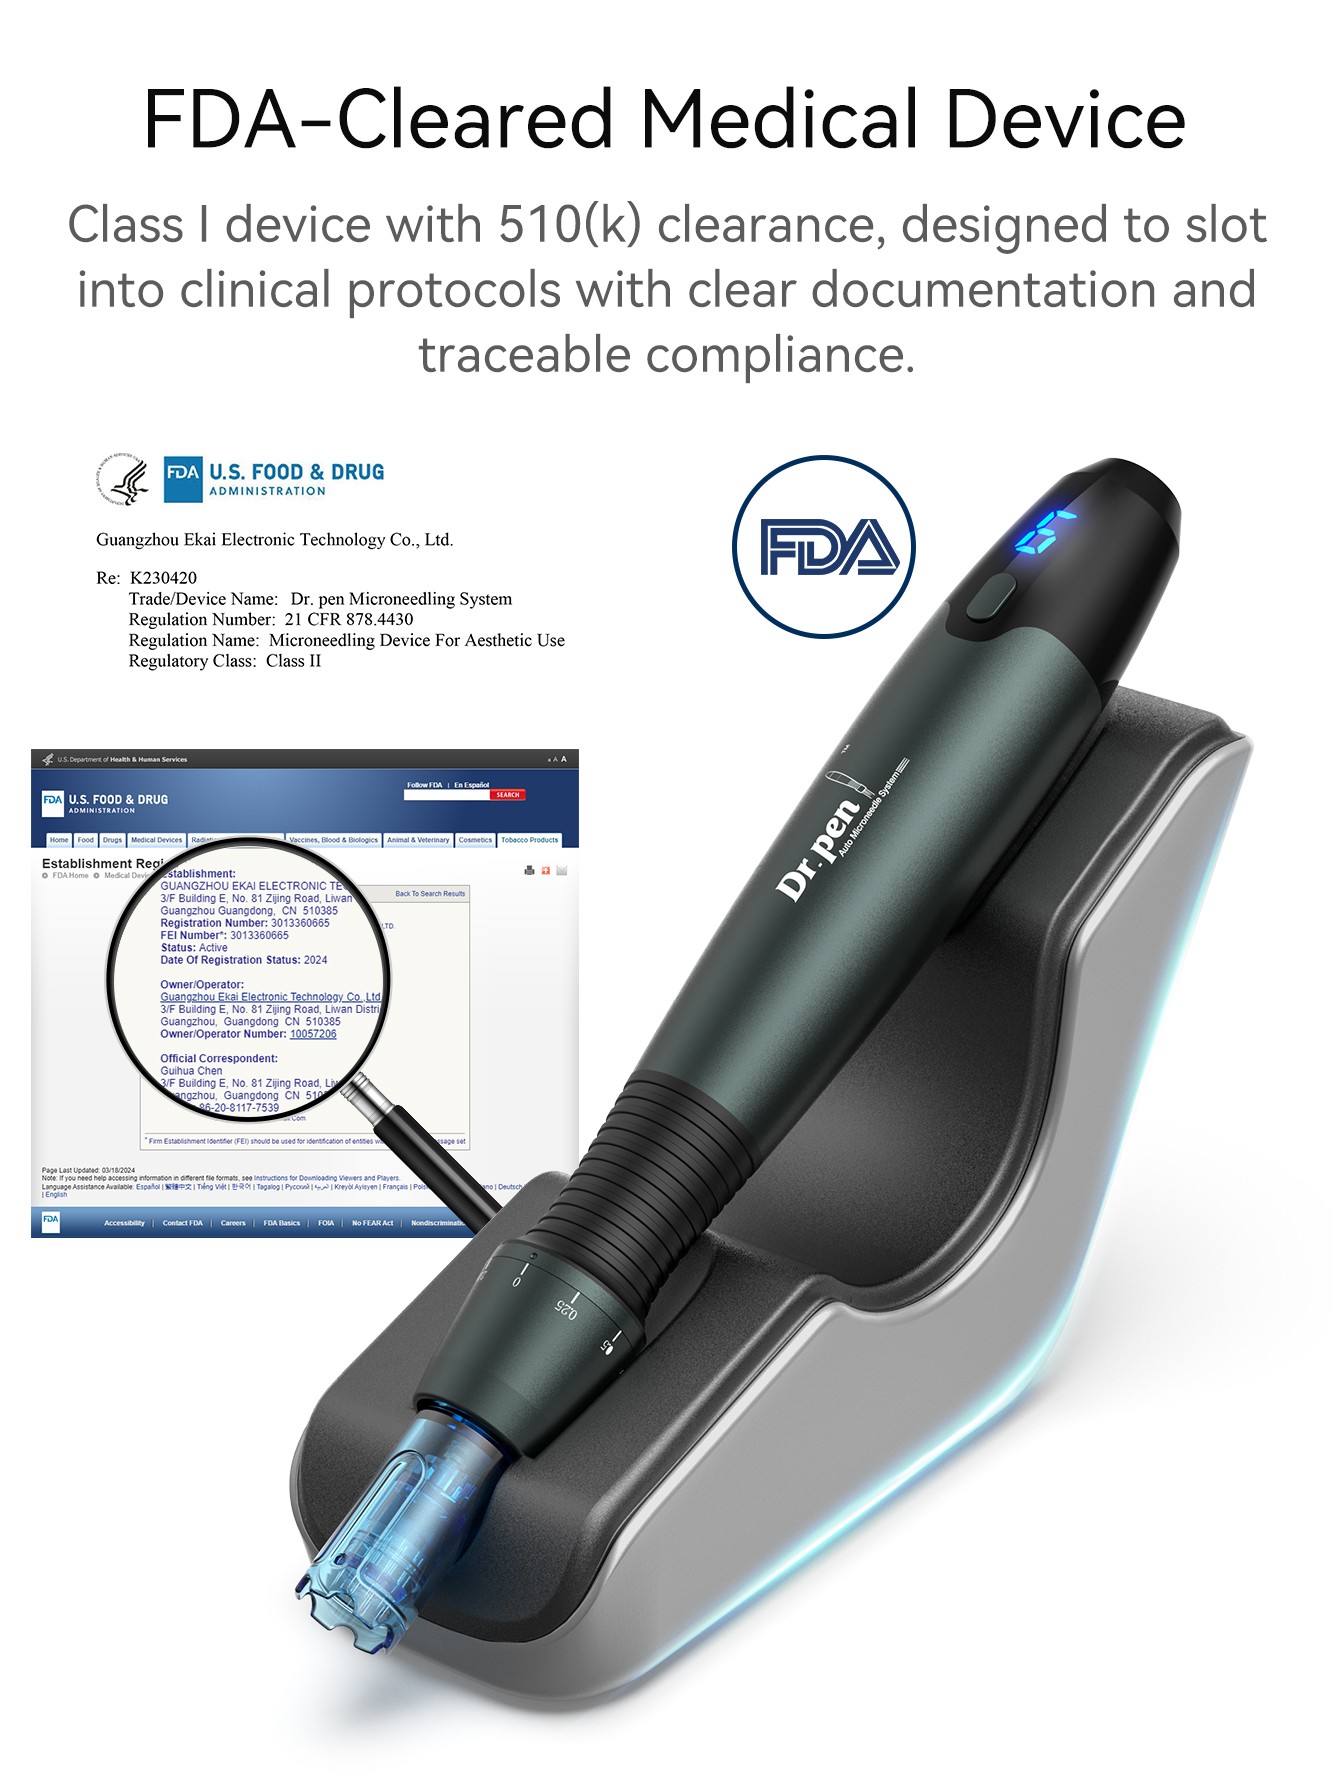
A20 combines an LED display, six speed levels and a low-battery “L” alert so you always know how much power you have left. Sessions stay predictable and focused, from the first pass to the last.
1
Glance at the screen before you start: confirm battery level, choose the right speed, and make sure the handpiece is fully ready for the full face or area you plan to treat.
2
Treat zone by zone with smooth, even passes, keeping an eye on the display. If the “L” symbol blinks, complete the current area rather than opening a new one.
3
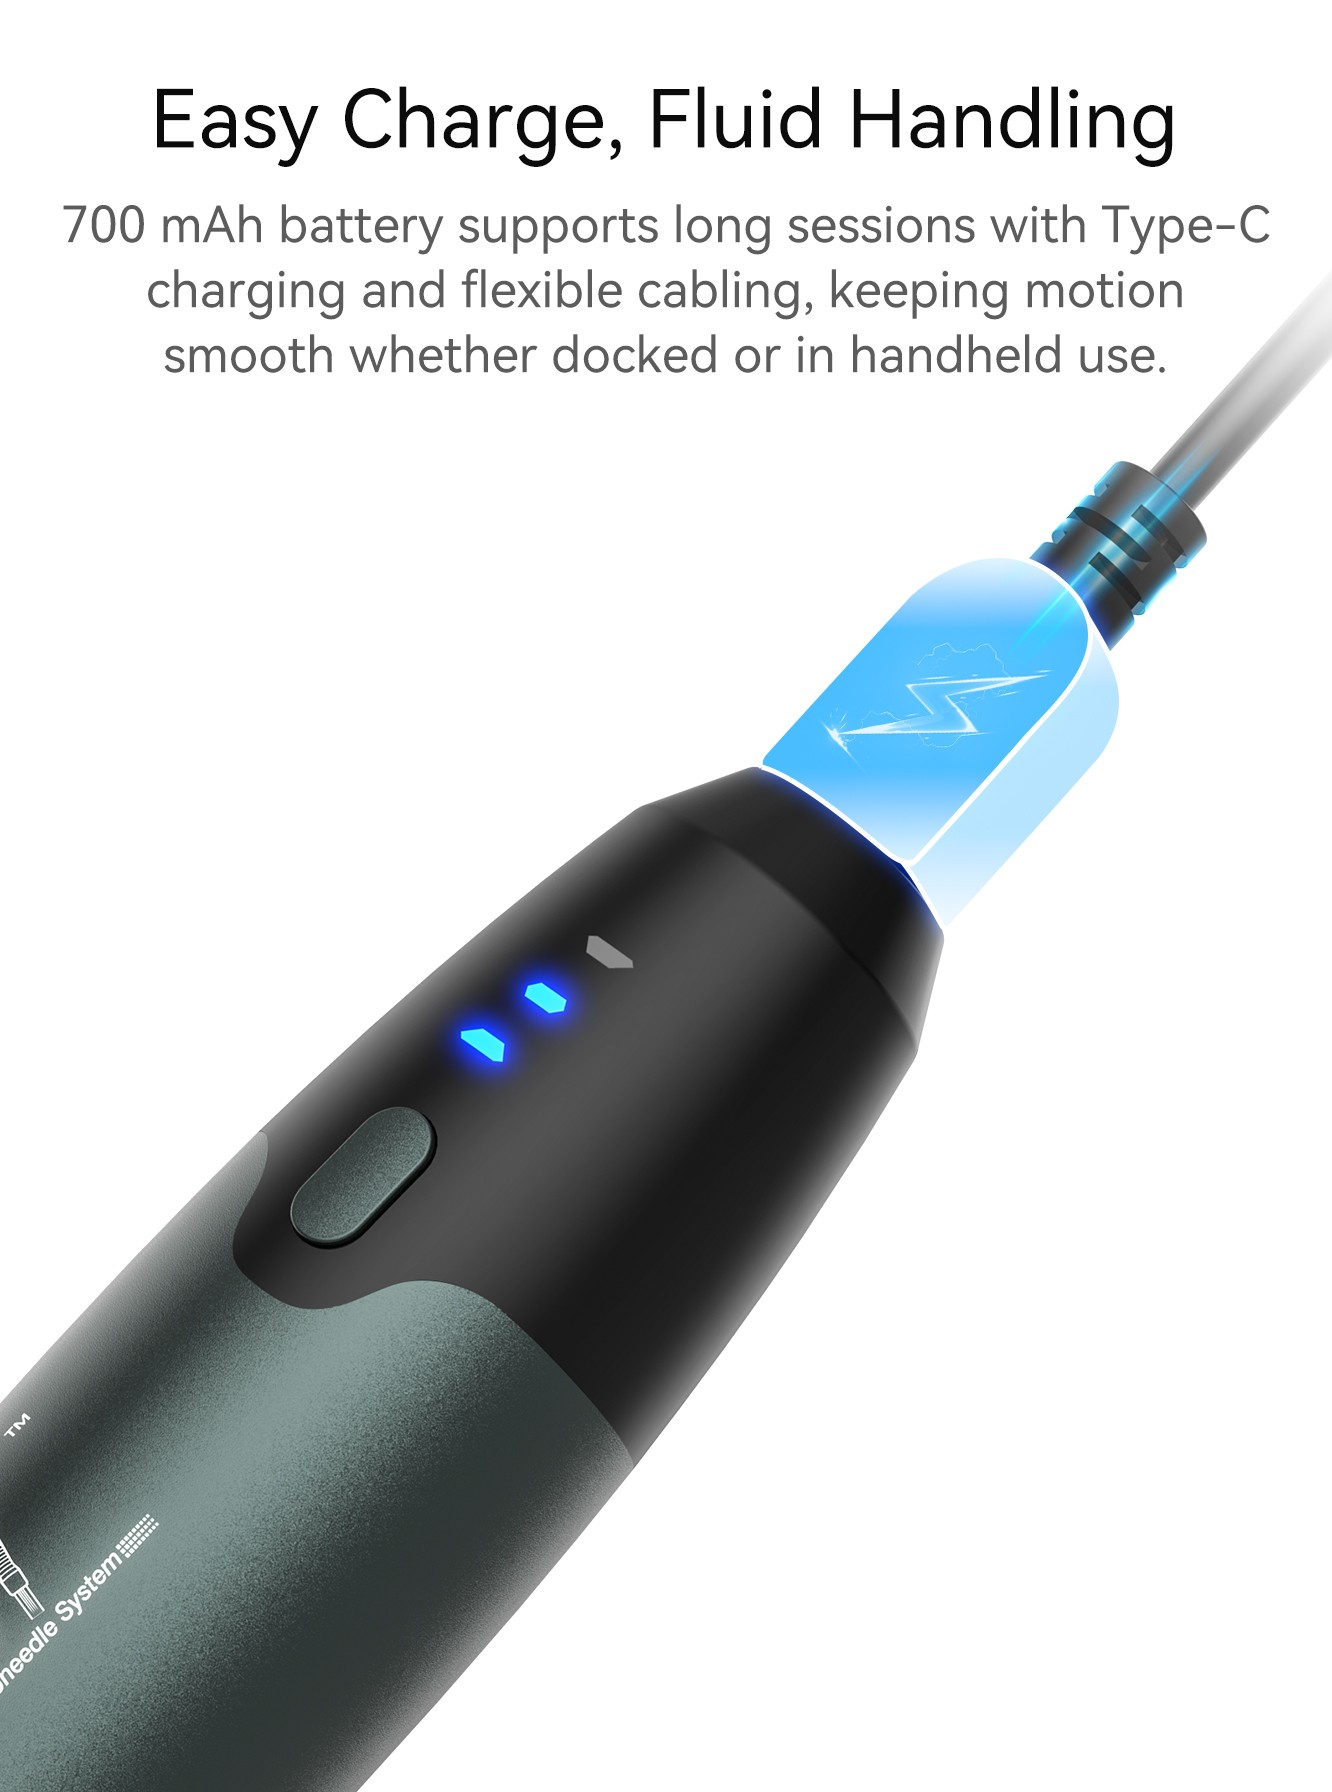
After finishing, switch off the device, wipe it down, and place A20 on charge. This keeps battery health stable and ensures full power for the next session.


Download Dr.pen® A20 Info Kit
